Repairing Wood Columns and Posts using Dura-Fix Flexible Epoxy Wood Filler
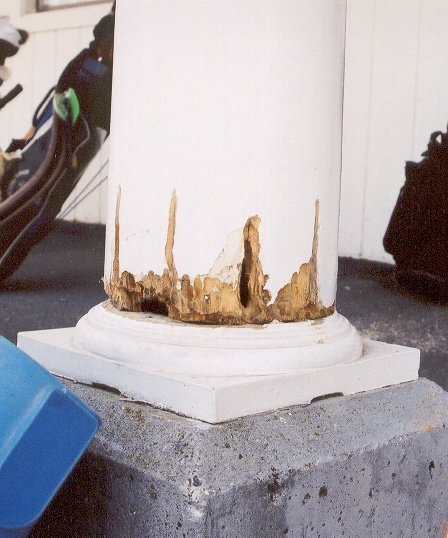
Use a sharp tool to assess the extent of damage.
Remove all damaged wood to sound, bright wood.
Repairing wood columns and posts can be a straightforward and cost-effective process with Dura-Fix. This epoxy wood filler, designed for structural and cosmetic wood repair, is ideal for fixing damaged, cracked, or rotted columns and posts, extending the life of the wood while enhancing its appearance. Here’s a step-by-step guide to repairing wood columns and posts using Dura-Fix.
Step 1: Assessing the Damage
Begin by assessing the extent of the damage on the wood column or post. Light damage, such as small cracks or surface deterioration, requires a straightforward fix, whereas rot or structural damage may need a more intensive repair. Make sure the wood is dry; if there’s mold or moisture, consider treating these issues first. For rot, scrape away all soft and brittle wood until only firm, undamaged material remains. This will provide a solid foundation for the filler to adhere to.
Step 2: Prepping the Surface
Good preparation is essential for a lasting repair. Remove all paint from the surrounding area. Use a chisel, Dremel tool, die-grinder, or putty knife to remove all rotted wood or deteriorated material. Sand the area lightly to create a rough surface, allowing the Dura-Fix to bond well. After prepping, remove dust ensuring a smooth application surface for the Dura-Fix epoxy. Use a moisture meter to insure the wood is below an 18% moisture content.
Step 3: Applying Dura-Fix Epoxy Wood Filler
Dura-Fix comes in two parts, a resin and a hardener, that need to be mixed in equal parts. On a clean, flat surface dispense and mix the two components thoroughly. Once mixed, Dura-Fix has a working time of 20-30 minutes.
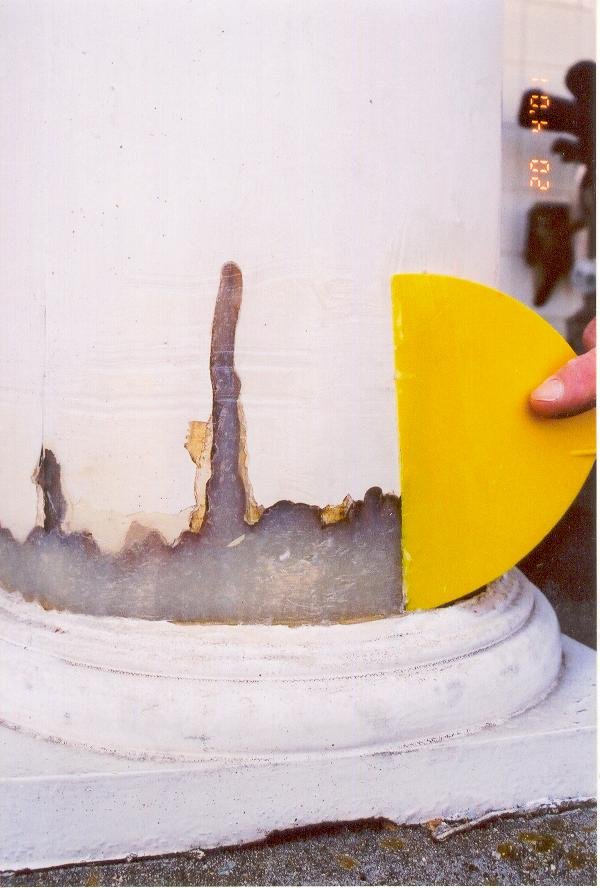
Use a putty knife to apply the epoxy filler to the damaged area, pressing it firmly into cracks and voids. Sculpt the epoxy to match the contours of the surrounding wood, as Dura-Fix is highly moldable before it hardens. Smooth out the surface with the putty knife, ensuring it is flush with the undamaged wood. Dura-Fix won’t shrink, slump or sag so there is no need to overfill the area.
Apply and sculpt into position
Dura-Fix has a high degree of compression strength and is capable of carrying a large load without cracking.
Step 4: Sanding and Shaping
Once the Dura-Fix wood repair epoxy has cured (typically 12 hours), sand to achieve a seamless, smooth finish. Start with a coarser sandpaper to remove any excess filler, then move to a finer grit for a smoother finish. The cured Dura-Fix is as sandable as natural wood, allowing you to shape and contour it precisely to match the rest of the column or post. This step is essential for achieving a professional, polished appearance.
Step 5: Priming and Painting
After sanding, clean the surface to remove dust. Apply a coat of primer to ensure good adhesion for your paint. Priming also seals the epoxy and protects it from moisture and UV damage. Once the primer is dry, finish the repair with a high-quality exterior paint. This step will further weatherproof the repair, blending it seamlessly with the rest of the wood.
Final Tips
Using Dura-Fix to repair wood columns and posts is an effective way to restore strength and aesthetics. For lasting results, maintain your columns with regular cleaning and inspect them for signs of damage. Dura-Fix’s durable formula ensures that once applied, your repair will withstand weather and wear for years.


